IntelMQ Manager
IntelMQ Manager is a graphical interface to manage configurations for IntelMQ. Its goal is to provide an intuitive tool to allow non-programmers to specify the data flow in IntelMQ.
Installation
To use the intelmq-manager webinterface, a working intelmq installation which provides access to the IntelMQ API is required. Please refer to the IntelMQ Installation page.
intelmq-manager can be installed with different methods. Use the same one as you did for IntelMQ itself and the IntelMQ API.
Native Packages
As the repositories are already set-up on your system, you can simply install the package intelmq-manager.
Our repository page gives installation instructions for various operating systems. No additional set-up steps are needed.
The webserver configuration (which is also shown below) for Apache will be automatically installed and the HTML files are stored under /usr/share/intelmq-manager/html.
The webinterface is then available at http://localhost/intelmq-manager.
Docker
The IntelMQ Manager is included in our Docker-images. See the section Docker in our installation guide.
Installation using pip
For installation via pip, the situation is more complex. The intelmq-manager package does not contain ready-to-use files, they need to be built locally. First, lets install the Manager itself:
pip3 install intelmq-manager
If your system uses wheel-packages, not the source distribution, you can use the intelmqsetup tool.
intelmqsetup which performs these set-up steps automatically but it may not detect all situations correctly.
If it finds intelmq-manager installed, calls its build routine is called.
The files are placed in /usr/share/intelmq_manager/html, where the default Apache configuration expect it.
If your system used the dist-package or if you are using a local source, the tool may not do all required steps.
To call the build routine manually, use intelmq-manager-build --output-dir your/preferred/output/directory/.
intelmq-manager ships with a default configuration for the Apache webserver (manager-apache.conf):
Alias /intelmq-manager /usr/share/intelmq_manager/html/

<Directory /usr/share/intelmq_manager/html>
    <IfModule mod_headers.c>
    Header set Content-Security-Policy "script-src 'self'"
    Header set X-Content-Security-Policy "script-src 'self'"
    </IfModule>
</Directory>
This file needs to be placed in the correct place for your Apache 2 installation.
On Debian and Ubuntu, the file needs to be placed at
/etc/apache2/conf-available.d/manager-apache.confand then executea2enconf manager-apache.On CentOS, RHEL and Fedora, the file needs to be placed at
/etc/httpd/conf.d/and reload the webserver.On openSUSE, the file needs to be placed at
/etc/apache2/conf.d/and reload the webserver.
Security considerations
Never ever run intelmq-manager on a public webserver without SSL and proper authentication!
The way the current version is written, anyone can send a POST request and change intelmq’s configuration files via sending HTTP POST requests. Intelmq-manager will reject non JSON data but nevertheless, we don’t want anyone to be able to reconfigure an intelmq installation.
Therefore you will need authentication and SSL. Authentication can be handled by the IntelMQ API. Please refer to its documentation on how to enable authentication and setup accounts.
Never ever allow unencrypted, unauthenticated access to intelmq-manager!
Configuration
In the file /usr/share/intelmq-manager/html/js/vars.js set ROOT to the URL of your intelmq-api installation- by default that’s on the same host as intelmq-manager.
CSP Headers
It is recommended to set these two headers for all requests:
Content-Security-Policy: script-src 'self'
X-Content-Security-Policy: script-src 'self'
Screenshots
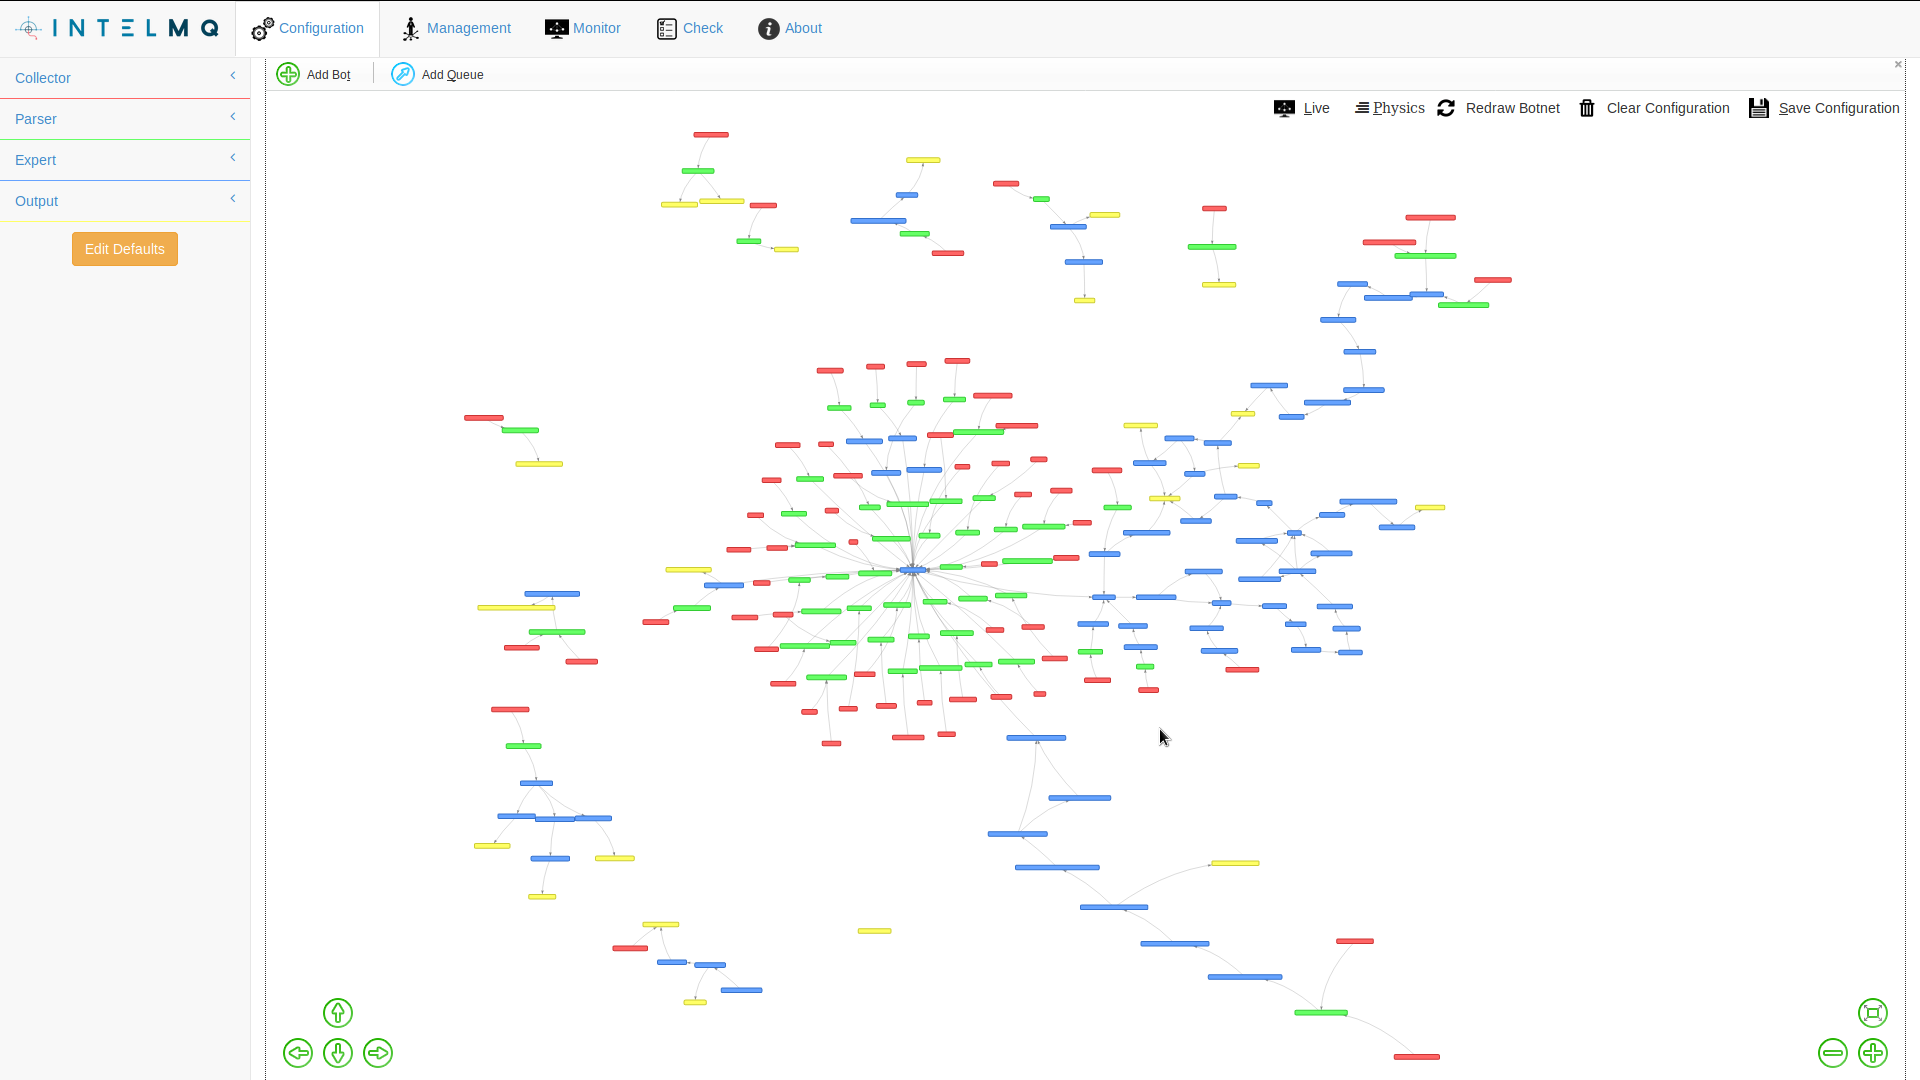
Pipeline
This interface lets you visually configure the whole IntelMQ pipeline and the parameters of every single bot. You will be able to see the pipeline in a graph-like visualisation similar to the following screenshot (click to enlarge):
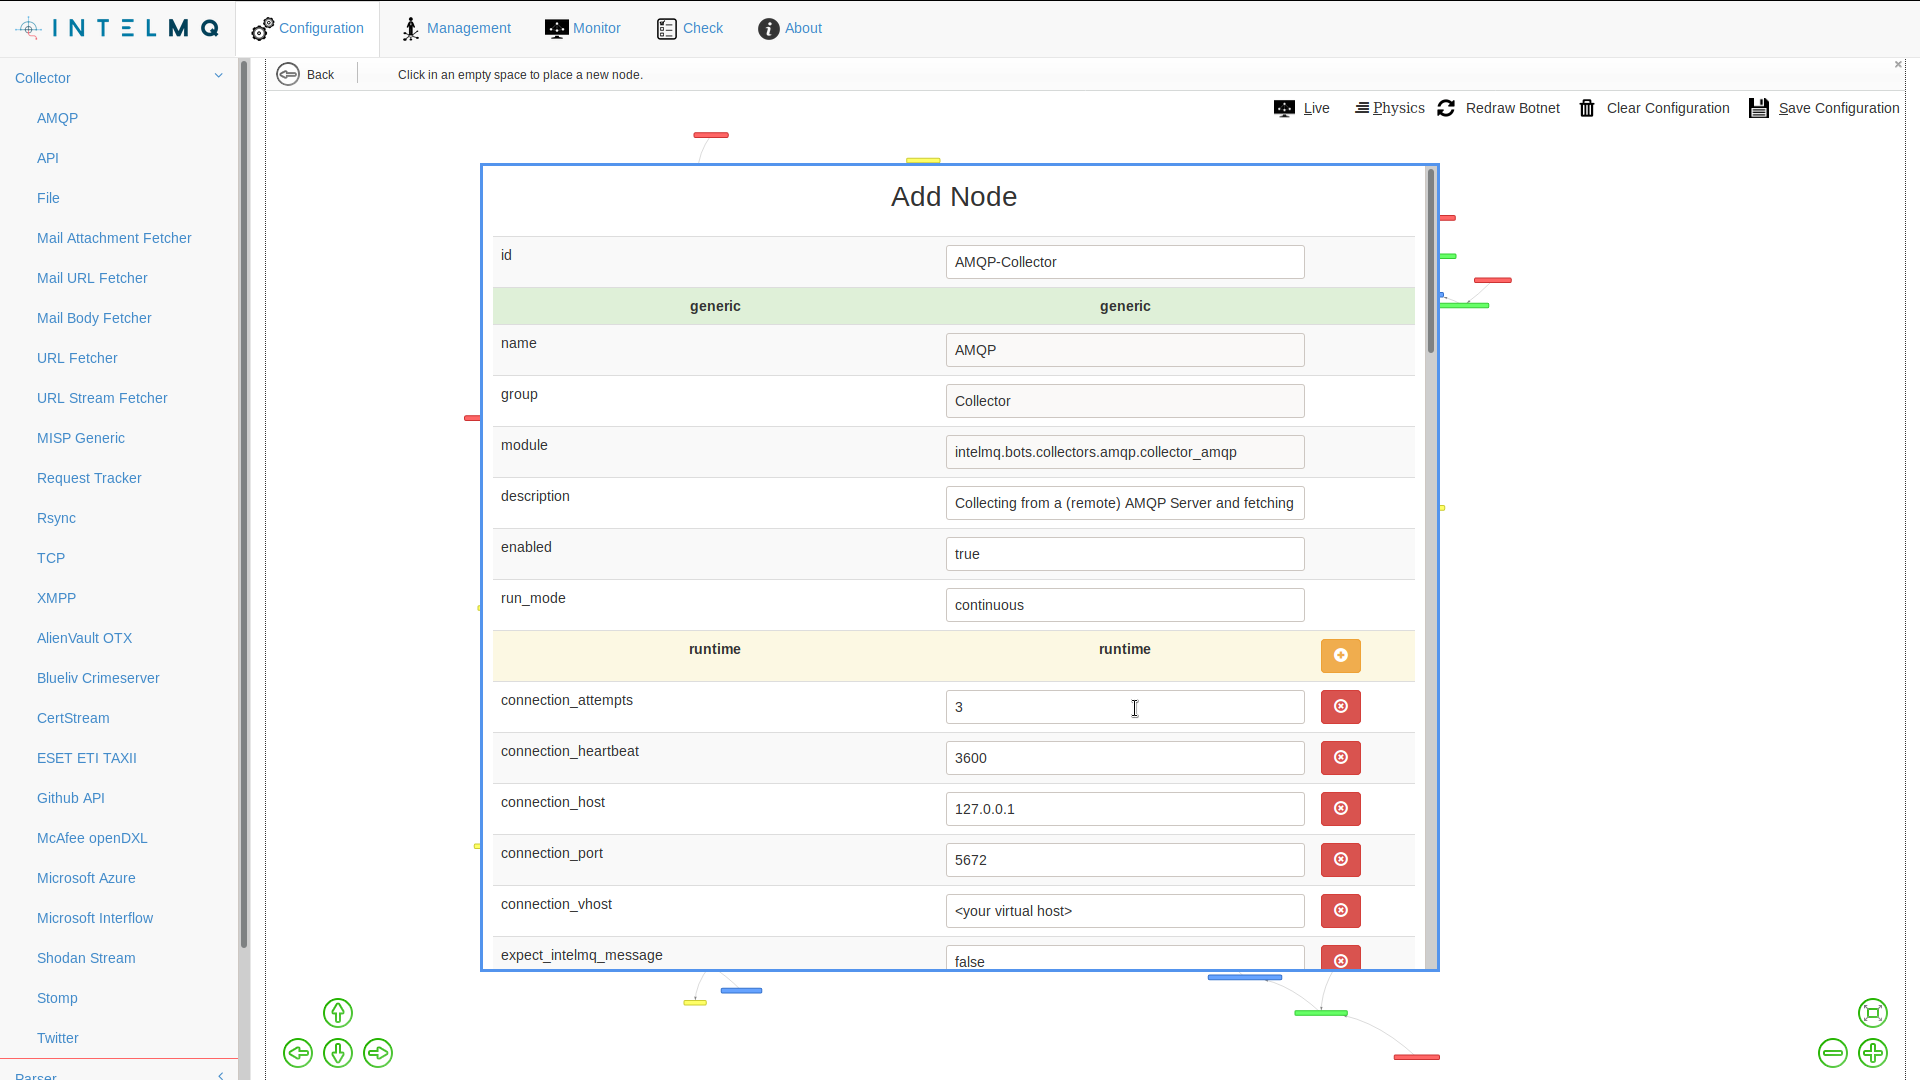
Bots Configuration
When you add a node or edit one you’ll be presented with a form with the available parameters for a bot. There you can easily change the parameters as shown in the screenshot:
After editing the bots’ configuration and pipeline, simply click “Save Configuration” to automatically write the changes to the correct files. The configurations are now ready to be deployed.
Note well: if you do not press “Save Configuration” your changes will be lost whenever you reload the web page or move between different tabs within the IntelMQ manager page.
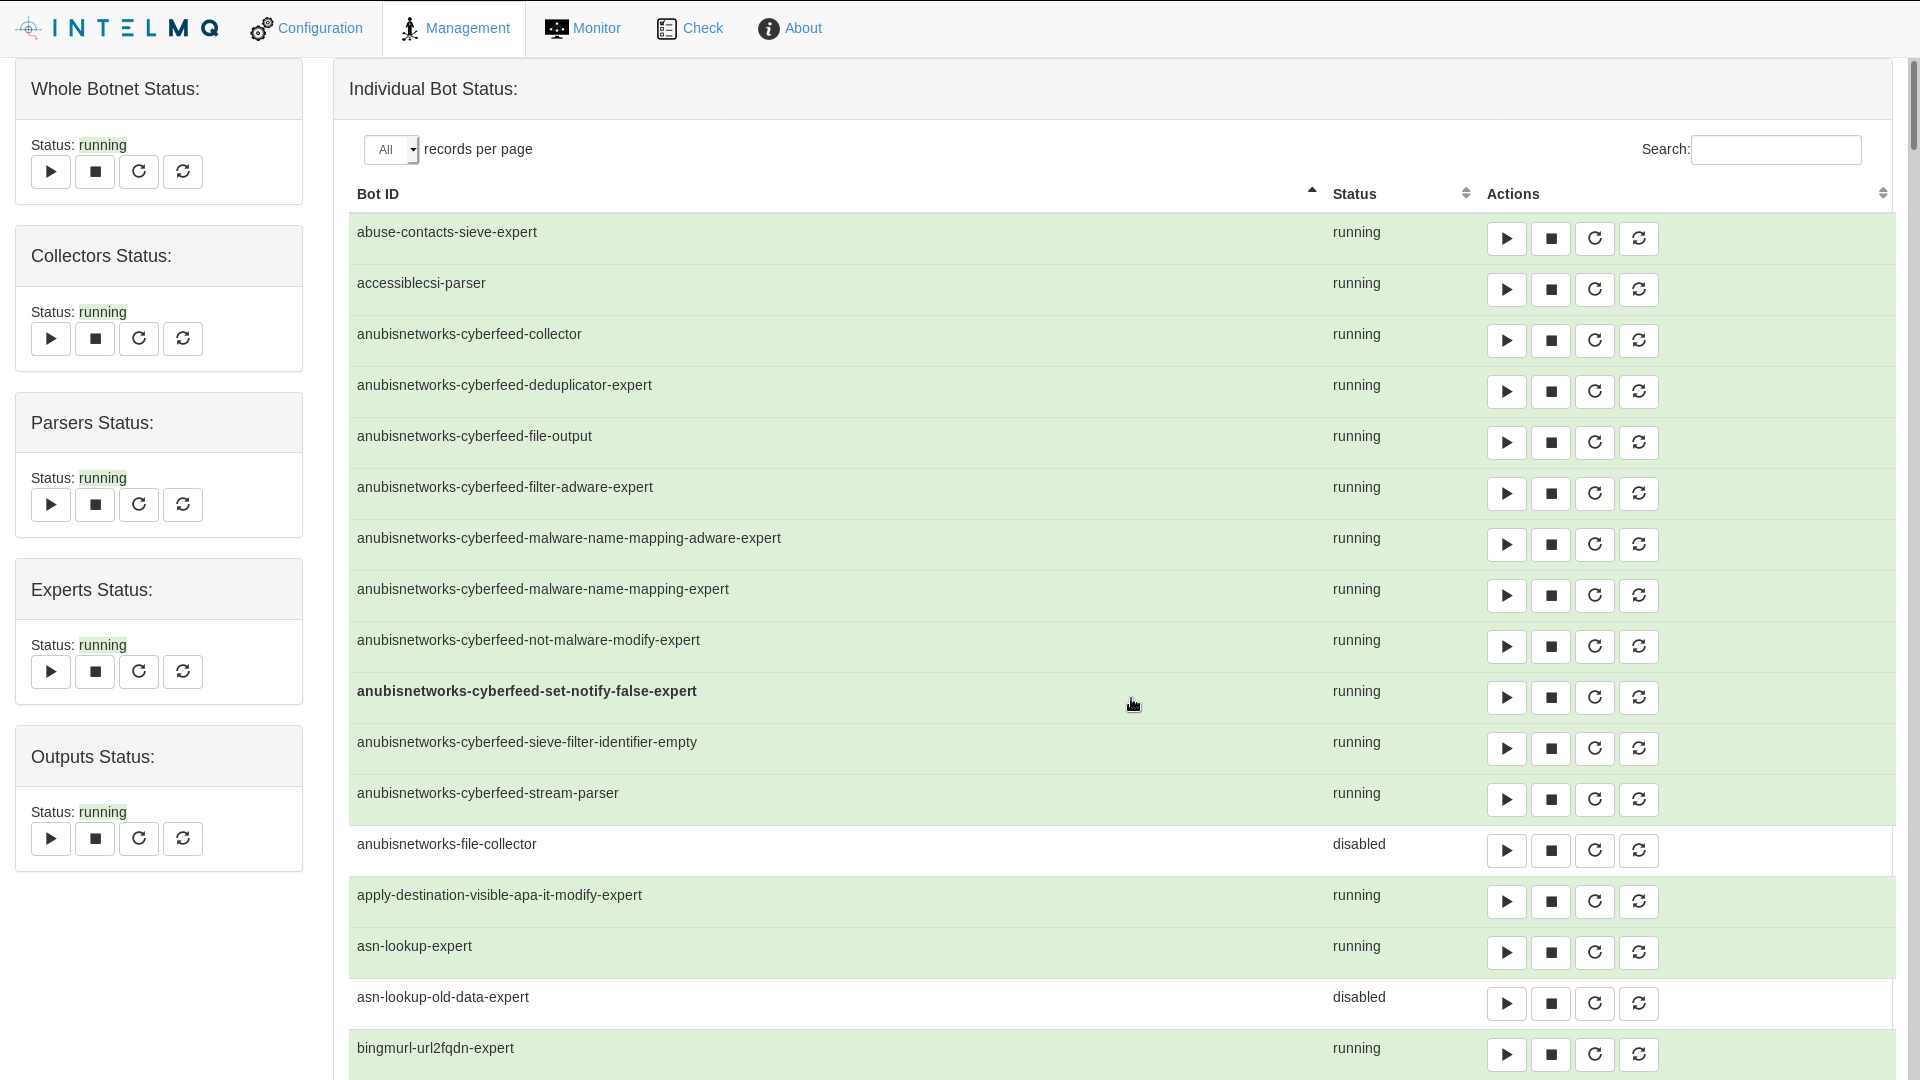
Botnet Management
When you save a configuration you can go to the ‘Management’ section to see what bots are running and start/stop the entire botnet, or a single bot.
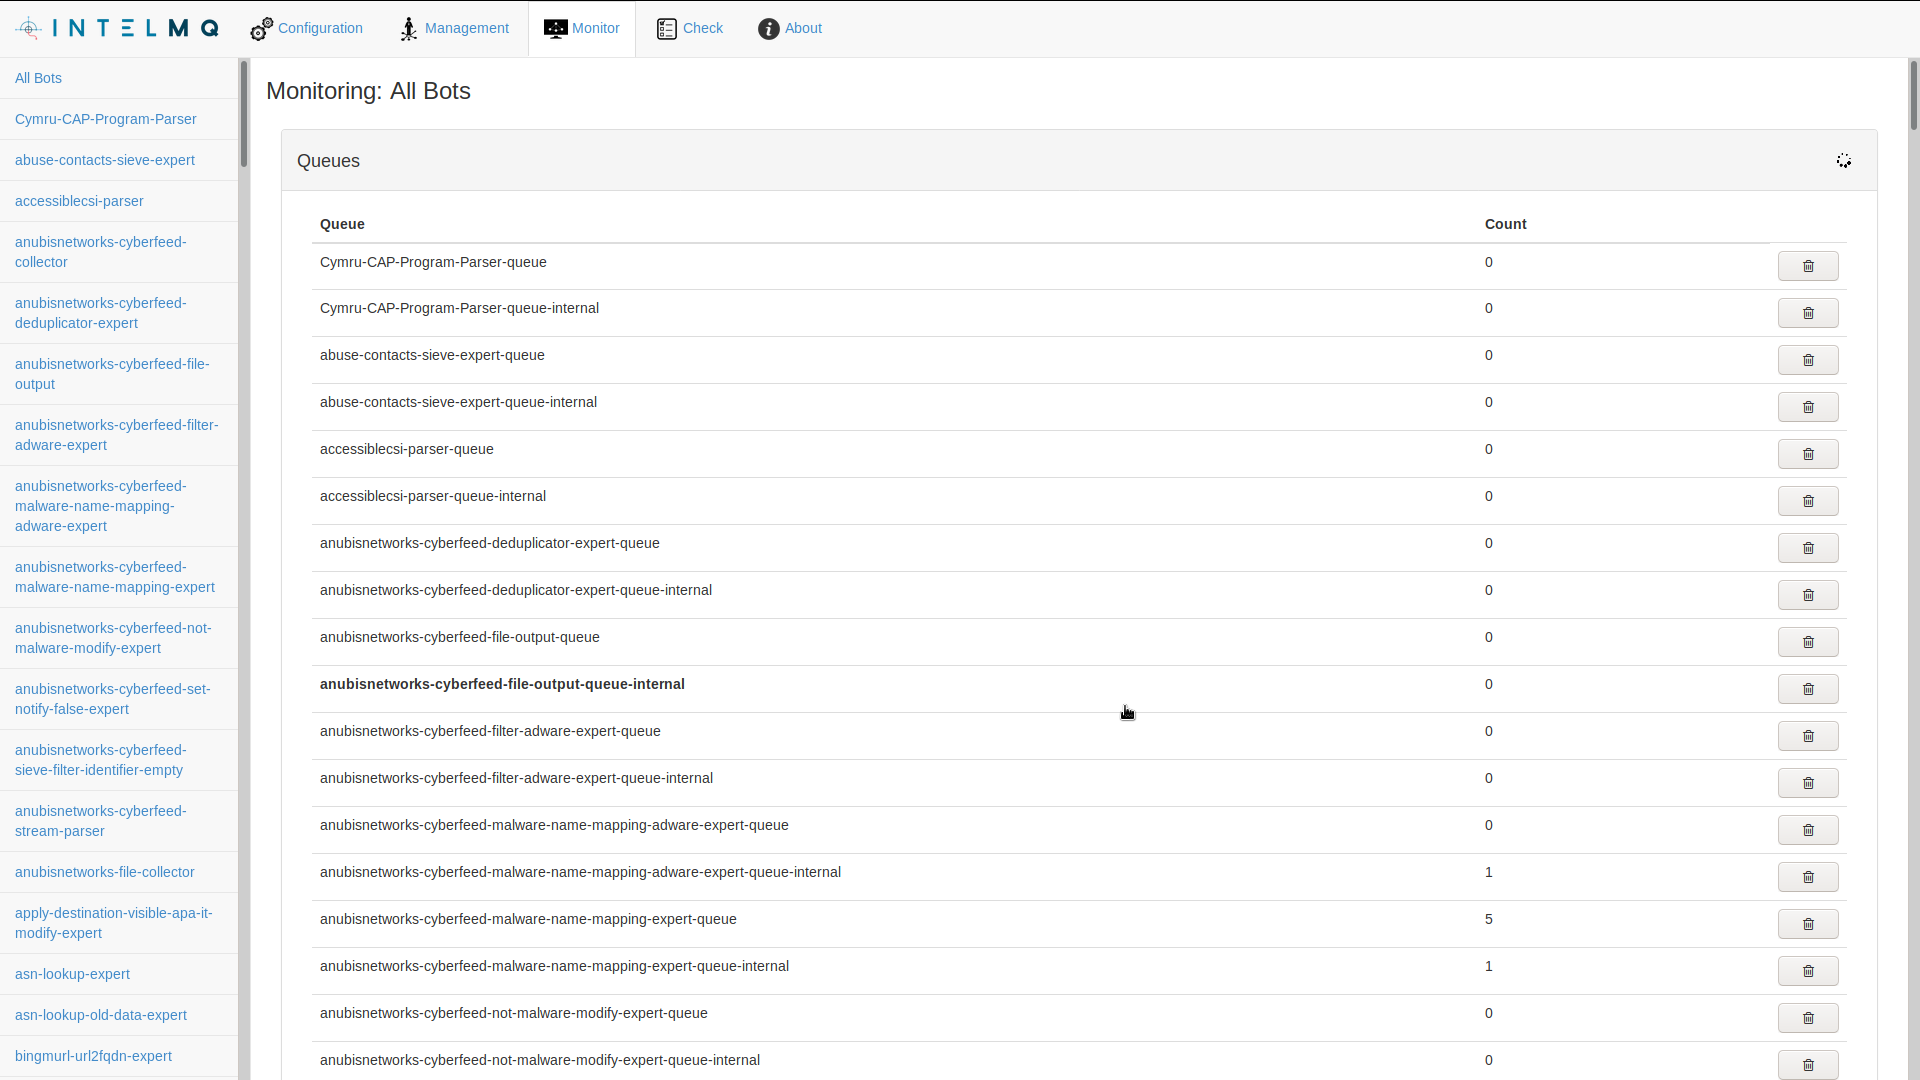
Botnet Monitoring
You can also monitor the logs of individual bots or see the status of the queues for the entire system or for single bots.
In this next example we can see the number of queued messages for all the queues in the system.
The following example we can see the status information of a single bot. Namely, the number of queued messages in the queues that are related to that bot and also the last 20 log lines of that single bot.

Usage
Keyboard Shortcuts
Any underscored letter denotes access key shortcut. The needed shortcut-keyboard is different per Browser:
Firefox: <kbd>Alt + Shift + letter</kbd>
Chrome & Chromium: <kbd>Alt + letter</kbd>
Configuration Paths
The IntelMQ Manager queries the configuration file paths and directory names from intelmqctl and therefore any global environment variables (if set) are effective in the Manager too.
The interface for this query is intelmqctl debug --get-paths, the result is also shown in the /about.html page of your IntelMQ Manager installation.
For more information on the ability to adapt paths, have a look at the Configuration section.
Configuration page
Named queues / paths
With IntelMQ Manager you can set the name of certain paths by double-clicking on the line which connects two bots:
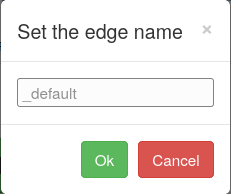
The name is then displayed along the edge:
